
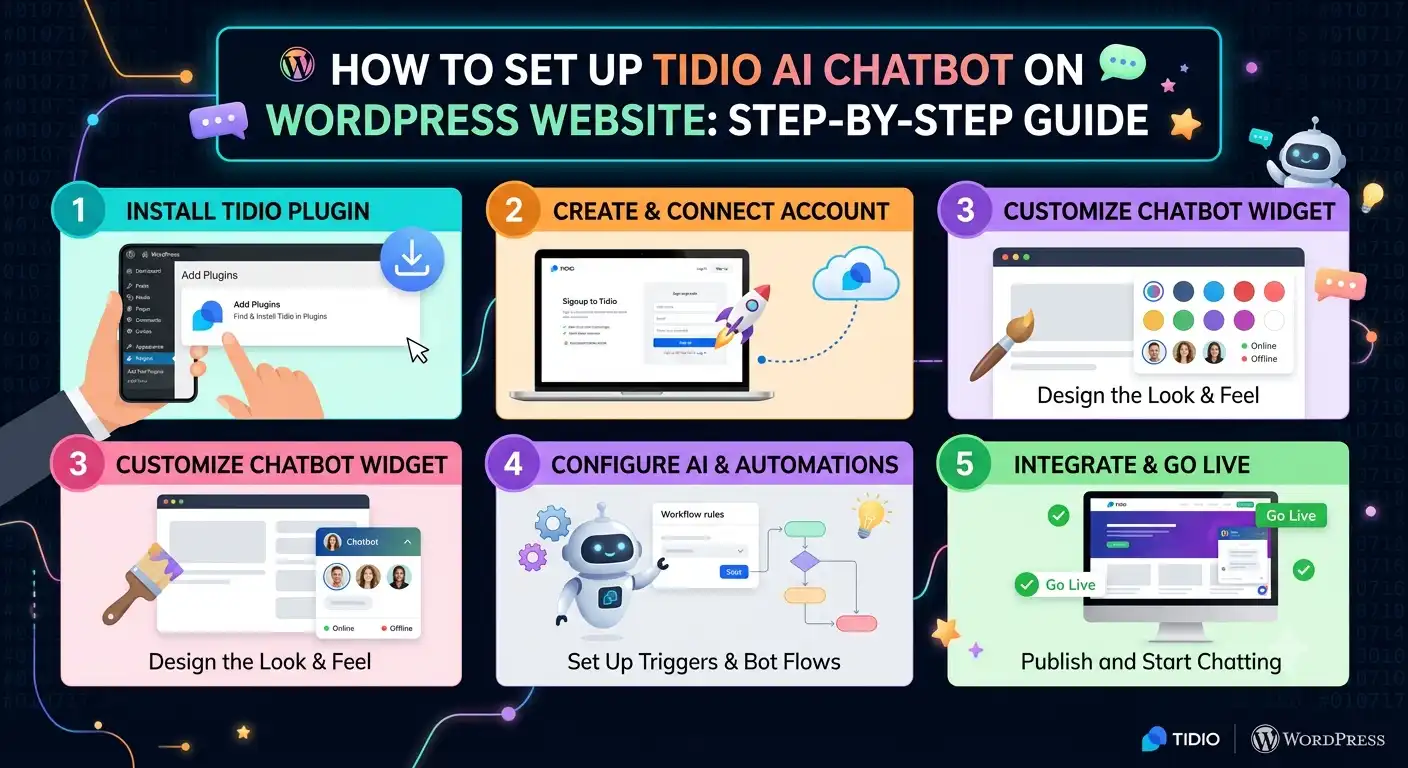
A proper Tidio WordPress integration can be the difference between a visitor who leaves your site confused and a visitor who becomes a paying customer. If your WordPress site loses people because nobody answers their questions fast enough, you already know the problem. A visitor lands on your pricing page at 11 PM, has one small question, gets no answer, and leaves. That sale is gone forever. This guide walks you through the complete setup process — account creation, plugin installation, widget customization, and training the Lyro AI chatbot so it gives real answers instead of generic ones.
We tested this setup flow directly inside a live WordPress dashboard and cross-checked every step against Tidio’s current onboarding wizard, so this guide reflects how the process works today, not how it worked two years ago.
By the end, your chatbot will be fully live: an AI-powered chat widget answering questions 24/7, capturing leads while you sleep, and handing off complex conversations to your human team when needed.
What Is Tidio AI Chatbot?
Tidio is a customer communication platform that combines live chat, email marketing, and an AI chatbot called Lyro into one plugin built for WordPress. A proper Tidio WordPress integration means Lyro reads your website content, help center articles, and FAQ pages, then answers customer questions in natural, conversational language — without you writing a single chatbot script.
For small business owners, this matters because most support questions are repetitive: shipping times, refund policy, business hours, product specs. Lyro handles these automatically, and your team only steps in for conversations that actually need a human touch.
Why Lyro Is Different From a Basic Chat Widget
A basic live chat widget is just a messaging box — someone still has to be online to reply. Lyro is trained on your own website data, so it answers accurately even when your team is offline, asleep, or busy elsewhere.
Why an Official Plugin Beats a Generic Script
Some chat tools only offer a JavaScript snippet you paste into your theme manually. Tidio’s plugin works differently — it ships as an official WordPress plugin, so updates, settings, and chatbot management all happen inside your familiar WordPress dashboard, staying compatible with core WordPress updates automatically.
Benefits of a Tidio WordPress Integration
Before jumping into setup, it helps to know exactly what you gain from connecting Tidio to your WordPress site.
Faster Response Times Improve Conversions
Visitors who get an instant answer are far more likely to complete a purchase or fill out a lead form than visitors who leave to search for the answer elsewhere.
24/7 Coverage Without Hiring Night Staff
Lyro keeps answering questions after your team logs off, which is especially valuable for WordPress sites with visitors spread across different time zones.
Lead Capture Runs on Autopilot
Every chat conversation can collect a name, email, or phone number automatically, feeding directly into your existing email list or CRM (see our lead capture tools roundup for options that pair well here).
Reduced Repetitive Support Tickets
Once Lyro is trained on your FAQ page, your inbox stops filling up with the same five questions every single day.
What You Need Before Your Tidio WordPress Integration
Gather these before opening your WordPress dashboard, so setup takes minutes instead of an hour of backtracking:
- Admin access to your WordPress dashboard
- A business email address for your Tidio account
- Your FAQ page, product pages, or help center content ready (this is what trains Lyro)
- A few minutes to test the widget on the live site once it’s active
Step-by-Step Guide: Connecting Tidio to Your WordPress Site
Step 1: Create Your Free Tidio Account
Go to Tidio’s website and sign up using your business email address. Tidio offers a free plan that includes the core live chat widget and limited Lyro AI responses, which is enough to test everything before committing to a paid tier. During signup, Tidio asks a few quick questions about your industry and website type — answer these accurately, since they shape your default widget setup.
Step 2: Install the Tidio Plugin From WordPress
Log into your WordPress admin dashboard and follow this path:
- Click Plugins in the left sidebar.
- Click Add New Plugin.
- Type Tidio into the search bar.
- Click Install Now next to “Tidio – Live Chat & AI Chatbots.”
- Once installation finishes, click Activate.
After activation, a new Tidio menu item appears in your WordPress sidebar. This is your control center for the rest of the integration.
Step 3: Complete the Connection
Open the Tidio menu inside WordPress. If you are not automatically redirected to the setup wizard, click Open Tidio Panel. Log in with the account you created in Step 1, then select your WordPress site as the project you want to integrate. Click Integrate Selected Project to link the plugin directly to your Tidio dashboard — this single click completes the technical side of the integration.
Step 4: Customize Your Chat Widget’s Appearance
This is where your chatbot starts looking like part of your brand instead of a generic plugin.
Choose Widget Position and Colors
By default, the widget sits in the bottom-right corner of your site. You can move it, change the accent color to match your brand, and pick between a chat bubble icon or a custom avatar.
Write a Custom Welcome Message
Set a short, natural greeting instead of the default text — something like “Hi! Have a question about pricing or shipping? Ask away.” Specific greetings get more engagement than generic ones like “How can I help you?”
Step 5: Activate and Configure Lyro AI Chatbot
This is the step most tutorials rush through, and it’s the one that actually determines whether your chatbot is useful or annoying.
Turn On Lyro From Your Dashboard
Inside the Tidio dashboard, click Lyro AI in the left sidebar, then click Get Started. Select your industry and the primary language your visitors use — Lyro supports multiple languages, so pick the one that matches your actual audience.
Choose AI-Only or Hybrid Mode
You can let Lyro handle conversations completely on its own, or run it in hybrid mode, where it answers questions but always offers a handoff to a human teammate. For most small business sites, hybrid mode is the safer starting point until you trust Lyro’s accuracy.
Step 6: Train Lyro With Your Website Content
Lyro’s answers are only as good as what it’s trained on. Point it to your FAQ page, return policy, shipping information, and product pages. Tidio’s crawler reads this content automatically, but you should still review the sample answers it generates and correct anything inaccurate before going live. Skipping this training step is the single biggest reason chatbots give vague or wrong answers.
Step 7: Set Business Hours and Offline Behavior
Define when your human team is actively monitoring chat. Outside those hours, choose one of three behaviors:
- Show an offline form — visitors leave their name, email, and question.
- Hand off to Lyro AI — the chatbot keeps answering around the clock.
- Hide the widget entirely — the chat bubble disappears outside hours.
For most WordPress businesses, handing off to Lyro outside business hours is the strongest option, since visitors still get instant answers at any hour, and anything Lyro can’t resolve gets queued for your team the next morning.
Step 8: Connect WooCommerce and Other Integrations
If you run a WooCommerce store, connect it inside Tidio’s integrations panel. This unlocks abandoned cart recovery messages, order status lookups inside the chat window, and product recommendations triggered by conversation. Non-eCommerce sites can instead connect email marketing tools or a CRM to push captured leads automatically.
Step 9: Test the Widget and Confirm Your Tidio WordPress Integration Is Live
Open your website in an incognito browser window and start a test conversation. Ask the exact questions a real customer would ask. If Lyro answers well, your chatbot is ready to go live. If any answer feels off, go back into the Lyro training panel and refine the source content it’s pulling from.
Types of Chatbots You Can Build With Tidio
Tidio isn’t limited to one fixed chatbot — you can build different chatbot types depending on what your site needs.
Lead Generation Chatbots
Designed to start a conversation with new visitors and collect their email or phone number before they leave the page.
Customer Support Chatbots
Focused on answering FAQs, order status questions, and troubleshooting steps automatically, reducing your support ticket volume.
Sales and Upsell Chatbots
Trigger product recommendations or discount offers based on which page a visitor is browsing, nudging them toward checkout.
Abandoned Cart Recovery Chatbots
Built specifically for WooCommerce and Shopify stores, these send a chat message when a visitor adds items to cart but doesn’t complete checkout.
Appointment Booking Chatbots
Useful for service-based WordPress sites, these let visitors schedule a call or consultation directly inside the chat window.
Tidio Pricing: Free Plan vs Paid Plans
Tidio’s free plan covers the core live chat widget and a limited number of Lyro AI responses per month, enough for small sites just getting started. A paid Tidio WordPress integration unlocks unlimited AI responses, advanced automation flows, and multi-agent support for larger teams. Before upgrading, run the free plan for a few weeks and track how many conversations Lyro actually handles — this tells you whether the paid tier will pay for itself in saved support time.
Tidio WordPress Integration vs Other Chatbot Plugins
If you’re comparing options before committing, here’s how Tidio’s WordPress plugin stacks up against the other common choices.
Tidio vs Tawk.to
Tawk.to is free and popular for live chat, but it lacks a built-in AI chatbot trained on your own content. Lyro reads your actual FAQ and product pages to answer questions automatically, which Tawk.to’s free tier doesn’t offer.
Tidio vs Intercom
Intercom is a powerful platform built mainly for larger SaaS companies, with pricing to match. Tidio delivers similar AI chatbot functionality at a fraction of the cost, making it a better fit for small businesses and growing WordPress sites.
Tidio vs WPBot
WPBot is a WordPress-native chatbot builder, but it relies on rule-based flows you have to build manually. Lyro uses AI to generate answers directly from your content, meaning less manual flow-building and faster setup.
Why This Integration Wins for Most Small Business Sites
For a small business that wants a working AI chatbot without hiring a developer or writing conversation scripts, the combination of an official plugin, a generous free plan, and content-trained AI gives this setup the best balance of ease of use and capability.
How to Measure Whether Your Chatbot Is Working
Installing the widget is only half the job — tracking its performance tells you whether the integration is actually helping your business.
Watch Your Chat-to-Lead Conversion Rate
Inside the Tidio dashboard, check how many conversations turn into a captured email or phone number. A healthy rate signals your welcome message and Lyro’s answers are doing their job.
Track Which Questions Lyro Can’t Answer
The conversation logs show you exactly where Lyro struggles. Use this list to add missing content to your FAQ page, which retrains Lyro automatically over time.
Monitor Response Satisfaction
Tidio lets visitors rate their chat experience. A dropping satisfaction score usually means Lyro needs more training data, or your live team needs to step in more often during peak hours. For a deeper look at conversion tracking, see our analytics dashboard walkthrough.
Best Practices for a High-Converting Setup
Keep the Welcome Message Specific, Not Generic
A greeting tied to the exact page a visitor is on (like a pricing page or product page) converts better than one generic message shown site-wide.
Review Lyro’s Answers Weekly During the First Month
AI chatbots improve fast when you correct mistakes early. Check the conversation logs weekly and retrain any answer that feels off.
Don’t Hide the Widget Behind Too Many Clicks
Keep the chat bubble visible and easy to find. Widgets buried in menus get ignored.
Match Your Widget Design to Your Brand
A chatbot that looks like a random plugin feels untrustworthy. Matching colors and tone to your site builds credibility instantly.
Common Mistakes to Avoid in Your Tidio WordPress Integration
Skipping the Lyro Training Step
Activating the plugin without training Lyro on your actual content is the most common mistake — it leads to vague, unhelpful answers that frustrate visitors instead of helping them.
Ignoring Mobile Preview
Always check how the widget looks on mobile before publishing. A poorly placed widget can cover buttons or navigation on smaller screens.
Never Testing With Real Customer Questions
Testing with obvious questions like “hello” doesn’t reveal weak spots. Test with the exact questions your real customers ask most often.
FAQ: Tidio WordPress Integration
Is Tidio free to use on WordPress? Yes. Tidio has a free plan that includes the live chat widget and a limited number of Lyro AI chatbot responses each month, which is enough for small WordPress sites to get started before considering a paid upgrade.
Do I need coding skills to install Tidio on WordPress? No. Tidio installs like any other WordPress plugin through the Plugins menu, and the entire setup — including Lyro AI configuration — is handled through a visual dashboard with no code required.
How long does the setup take? Most WordPress site owners can complete the full integration, including training the Lyro AI chatbot, in under 20 minutes.
Can Tidio work with WooCommerce? Yes. Tidio connects directly with WooCommerce, enabling features like abandoned cart recovery messages and order status lookups inside the chat window.
Will the Tidio chat widget slow down my WordPress site? Tidio’s widget is lightweight and loads asynchronously, meaning it shouldn’t meaningfully affect your Core Web Vitals or page speed scores when installed correctly.
Can I turn off Lyro AI and use only live chat? Yes. You can disable Lyro entirely and run Tidio as a standard live chat widget if you prefer to handle every conversation manually.
Conclusion
A complete Tidio WordPress integration takes less than half an hour, but the impact compounds every single day it runs. Once Lyro is properly trained on your FAQ and product content, your site answers customer questions instantly, captures leads while you’re offline, and frees your team from repetitive support tickets. The setup itself is simple — installing the plugin, connecting your account, and customizing the widget only takes a few clicks. The real work, and the real payoff, comes from training Lyro properly and reviewing its answers during the first few weeks. Get that part right, and your chatbot effectively gives your site a support agent that never sleeps.

Asrar Ahmad is the founder and lead SEO strategist at Rankify SEO & AI Agency, with 4+ years of experience in technical, on-page, and off-page SEO for US and UK clients. He specializes in topical authority building, keyword strategy, and data-driven content that ranks and converts.